What you need?
 |
| rubber bands |
 |
| dye- we got RIT dye from Lincraft for about $7.50/pack. Follow the instructions in the pack to prepare the dye. |
 |
| timer to keep in check the length of time your fabric is in the dye |
 |
| salt to add into the dye to make the colour more lasting |
 |
| a bucket and your fabric |
 |
| gloves to keep hands clean |
The first pattern we did
- lay the shirt flat.
- choose the middle of the shirt and pinch it.
- proceed to swirl the shirt into a ball.
- tie the shirt with a rubber band. you can spray the shirt with some water before swirling it so that it'll be easier to keep the shirt in place.
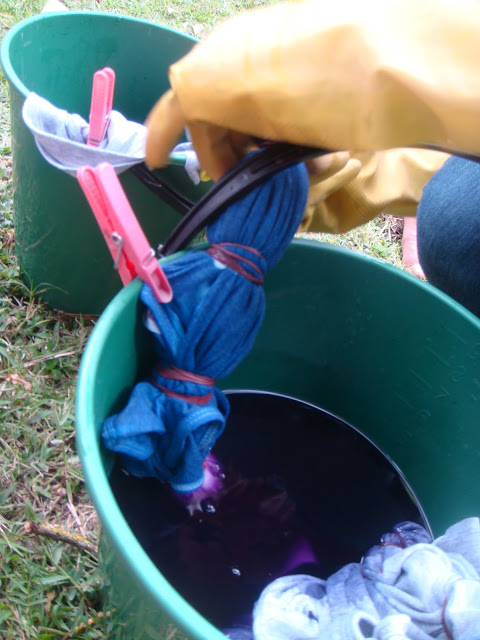
- depending on how many colours you would like on your shirt, dip a part of the shirt into your (hot) pre-mixed dye and hold it there for about 10 minutes (or according to your dye instructions).
- if working with more than 1 colour, make sure to leave some white areas for the other colours.
- when satisfied with the amount of dyeing, hose down and rinse the shirt with cold water; rinse until the water runs clear. Then unwind the rubber bands from the shirt and continue to rinse. Squeeze the excess water and hang the shirt on a clothes lines for it to dry.
- this way of tying the shirt would create a 'shell-like' shape or swirl in the middle of your shirt.
 |
| finished product on a clothesline |
The second pattern
- lay your fabric, pinch the area where you would like the spreading of the dye to start. while holding onto that area lift your fabric until it falls like a cone. grab some rubber bands and proceed to tie the fabric this would create a long, cone-like shape. the rubber bands do not necessarily need to be evenly spaced, remember, the patterns are entirely up to you.
- dip the fabric into the (hot) pre-mixed dye. depending on how many colours you are using, remember to leave enough white areas for the other colours to come through.
- leave the fabric in the dye for the appropriate time (this will be instructed on the dye package).
- take the fabric out of the dye, hose down and rinse with cold water until the water runs clear or when wringed runs clear.
- undo the rubber bands, continue to hose down the fabric, wring and hang to dry.
- this way of tying the fabric would create a circle of colours spreading wide and wider.
 |
| finished product on the clothes line |
The third pattern
- lay your fabric, pinch a little bit of the fabric and tie a couple of rubber bands along the pinched fabric. repeat this step a few more times all over the fabric. the finished tied fabric would look like an alien with tonnes of 'cones' sticking out of its body. haha!
- dip the fabric into the (hot) pre-mixed dye and leave in there for the appropriate time limit. repeat this step with other dyes if you want more than 1 colour.
- when satisfied with the colour and time the fabric has been soaking for, hose down and rinse the fabric with cold water until the water runs clear or when wringed. Untie the rubber bands and continue to rinse a few times.
- wring and hang it on the clothesline to dry.
 |
| finished product on clothesline |


No comments:
Post a Comment